Mini Apple Pies

Original recipe here: Mini Apple Pies

Mini Apple Pies

  • Servings: 12
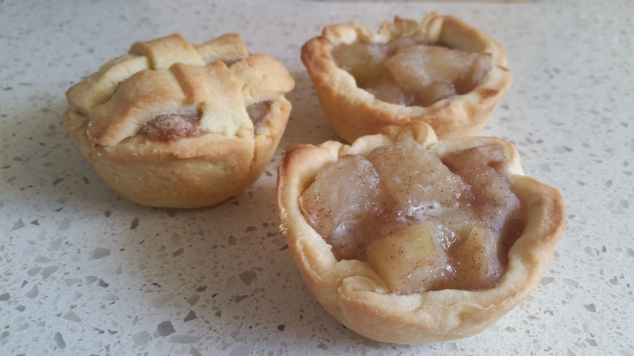
  • Difficulty: Easy
  • Print

WEB20150207_111432Ingredients: Pastry

  • 2 cups flour
  • 1 tsp salt
  • 2/3 cup butter, chilled and chopped
  • 4 tbsp water

Ingredients: Filling

  • 5 medium apples, peeled and cut into small pieces
  • 3/4 cup sugar
  • 2 tsp cinnamon
  • 6 tbsp flour
  • 2 tbsp butter

Method: Pastry

  1. Preheat oven to 220°C. Get a muffin tray out, no need to grease or line with baking paper.
  2. Mix flour and salt. Rub in butter with fingertips. Combine using an electric beater.
  3. Add water and continue beating until just sticking together.
  4. Combine by hand and roll onto lightly floured surface until 1/4 inch thick.
  5. Cut out 12 x 4 inch circles and put in muffin tray.

Method: Filling

  1. Mix apples, sugar, cinnamon, and flour by hand until all apples are covered.
  2. Spoon mixture into pastry cases.
  3. Cut butter into 12 squares and put on top of each apple pie.
  4. Decorate pies with extra pastry if you wish.
  5. Bake for 16-18 minutes or until the pastry is golden and the apples are bubbling.

Notes

You don’t need to grease the muffin tray – just use a spoon to loosen the pies and they’ll come straight out.

When making the pastry, I rub the butter and flour together with my fingertips to make it easier to mix with the electric beater.

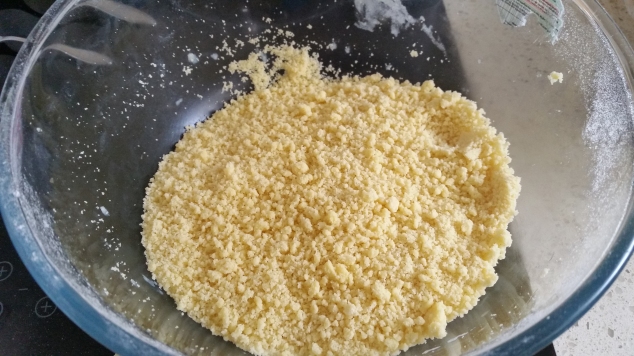
After mixing the flour, salt, and butter, the pastry should resembled peas.

WEB20150207_084422

Pastry before the water.

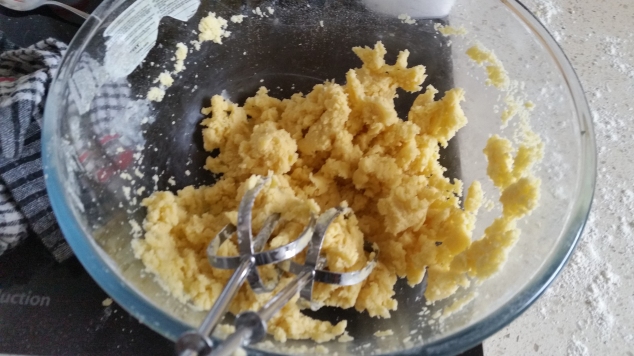
After adding the water, mix until just starting to come together.

WEB20150207_084850

Mix water in until just combined.

Use something with a 4-inch base to cut circles into the pastry. I used my tin of drinking chocolate.

Gently hold the sides of the circles and push into the muffin tin. Do not lay the pastry circles over the muffin tin and use your finger to push the middle in – the pastry will likely split and you will have to roll it out again.

Mixing the filling by hand is definitely a job the kids can get involved with.

I used 3 x 385g tins of pie apples. With this amount of filling, I used two batches of pastry and made 27 mini pies.


No-Bake Chocolate Strawberry Oasis Pie

Original recipe here: Chocolate Strawberry Oasis Pie

Find other easy, no-bake dessert recipes here: 23 No-Bake Desserts

No-Bake Chocolate Strawberry Oasis Pie

  • Servings: 8
  • Difficulty: Easy
  • Print

WEB20150204_132446

Ingredients: Base

  • 6 tbsp butter, extra for greasing
  • 30g dark cooking chocolate, chopped
  • 200g chocolate wafer biscuits

Ingredients: Filling

  • 350g strawberries, trimmed and halved
  • 2/3 cup sugar
  • 1/4 cup cornflour
  • 2 tbsp cocoa powder
  • 1/4 tsp ground ginger
  • 1/8 tsp ground nutmeg
  • pinch of salt
  • 6 large egg yolks
  • 2 1/2 cups milk
  • 170g dark cooking chocolate, chopped
  • 1 tsp vanilla extract

Method: Base

  1. Grease a pie dish. I also recommend lining the dish with baking paper for easy serving.
  2. Melt butter and chocolate in the microwave or in a glass dish over a boiling pot of water until smooth.
  3. Finely grind the wafer biscuits and mix into the chocolate mixture.
  4. Press mixture into greased pie dish and freeze until firm – for around 30 minutes.

Method: Filling

  1. Whisk sugar, cornflour, cocoa powder, nutmeg, ginger, and salt in a saucepan. Stir in egg yolks to form a thick paste.
  2. Gradually whisk in milk, then whisk over a medium-high heat. Bring to a boil, continually stirring, until mixture thickens. Remove from heat.
  3. Gradually stir in chocolate. Stir in vanilla, and allow to cool for five minutes, stirring occasionally.
  4. Arrange strawberry halves in a single layer in the bottom of the set base. Pour chocolate filling over strawberries. You might not use all the filling, so don’t pour it all in at once.
  5. Chill until set – at least two hours.

Notes

Whenever I need to melt butter/chocolate/anything together, I always do so on the stove. This means I can stir it and keep an eye on what’s going on while I carry on with the rest of my cooking. To do this, pour a small amount of water into a saucepan and bring to the boil. Add your ingredients to a heatproof bowl and sit the bowl over the saucepan, stirring the ingredients occasionally.

If you don’t have a food processor to grind the biscuits, just do what I do – break them up with your hands and then crush with the bottom of a glass.

I also use the bottom of a glass to press the base mixture into the pie dish.

Crack and separate the eggs into a bowl before adding the yolks to the saucepan. This means you won’t be adding bad eggs to the mixture.

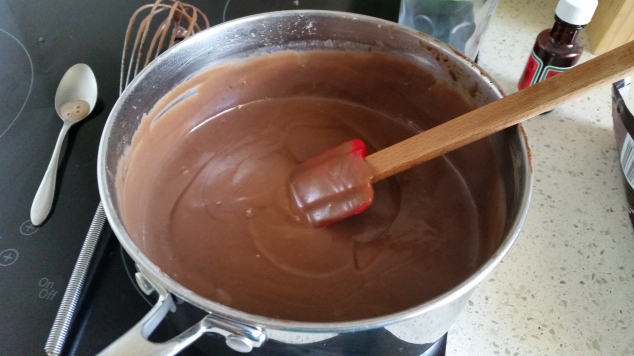
The filling mixture should start very runny, but become very thick once you boil it.

WEB20150204_130931

The chocolate mixture should thicken once it boils.

Stir in the dark chocolate once you have removed the filling from the heat – the chocolate will melt, as the mixture will still be quite hot.

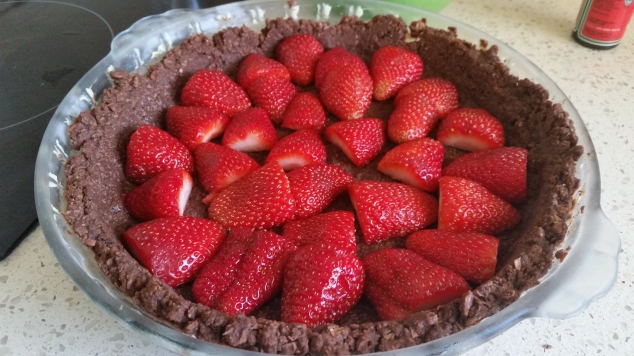
Layer the halved strawberries into the bottom of the base as sparsely or as thickly as you please – I crammed heaps in because I love strawberries.

WEB20150204_131419

I used as many strawberries as I could cram into the base.

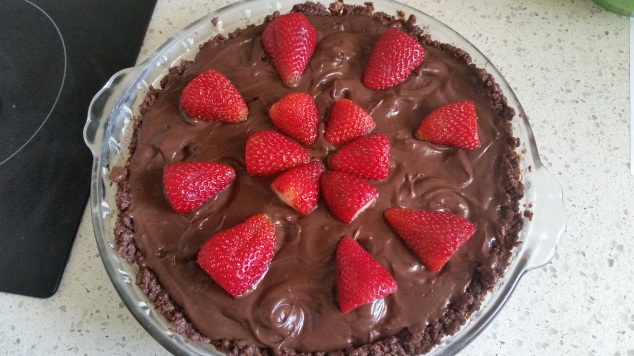
When pouring the chocolate filling over the strawberries, just add enough to cover them, and then work it into the gaps with a spatula before adding more. As I said in the method, you might not use all the filling – luckily, it makes for a great dipping chocolate if you have any leftover strawberries, and it refrigerates well.

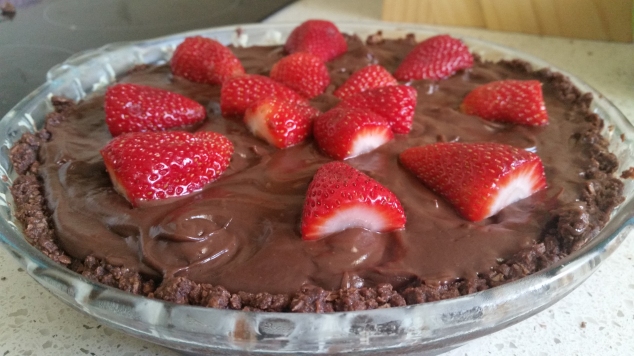
Decorate the cake with strawberry halves if you so desire.

WEB20150204_132509

I thought it looked too plain.


10-Minute Self-Saucing Chocolate Pudding

10-Minute Self-Saucing Chocolate Pudding

  • Servings: 6-8
  • Difficulty: Easy
  • Print

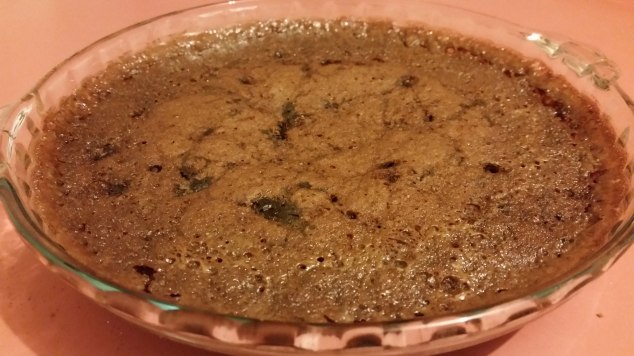
WEB20141105_220832

Ingredients: Pudding

  • 1/2 cup self raising flour
  • 1/2 cup caster sugar
  • pinch salt
  • 1 tbsp cocoa
  • 1 egg
  • 55g butter
  • 4 tbsp milk
  • 1 tbsp vanilla essence

Ingredients: sauce

  • 1/2 cup brown sugar
  • 1 tbsp cocoa
  • 150mL water

Method: Pudding

  1. Sift the flour, sugar, and cocoa together in a bowl. Add salt. Mix.
  2. Add egg, butter, milk, and vanilla and combine with an electric mixer. Pour into a microwave safe bowl. (Mixture rises about 5cm.)

Method: Sauce

  1. Combine brown sugar and cocoa in a bowl. Sift over wet mixture.
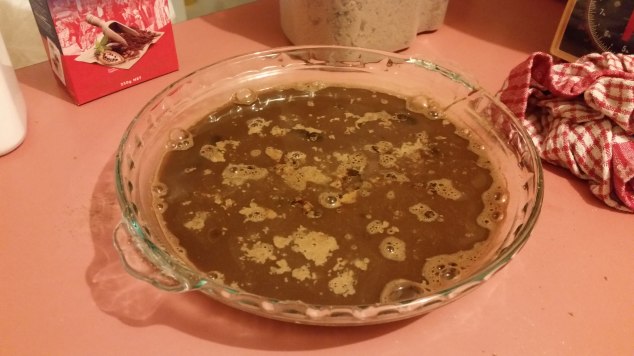
  2. Warm water and gently tip over mixture. Gently stir the very top of the mixture until you can no longer see any dry sugar or cocoa.
  3. Gently pass a fork or spoon through to the bottom of the bowl in several places to ensure the sauce forms at the bottom.
  4. Cook in an 800W microwave for five minutes.

Notes

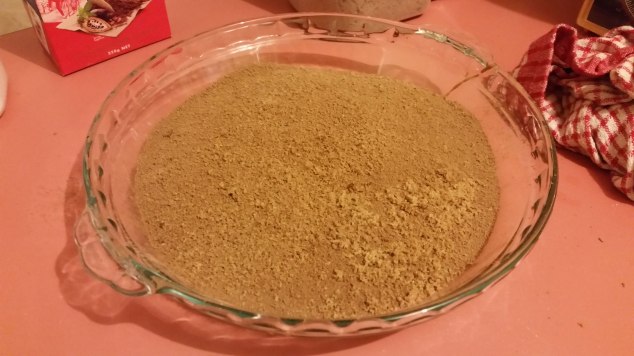
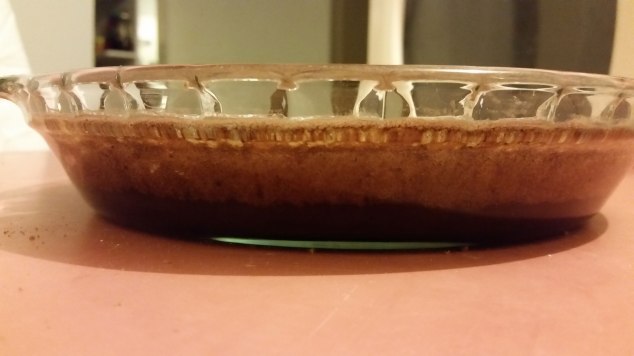
I use a Pyrex baking dish for several reasons: it’s looks better; it takes up less space; and the ratio of pudding to sauce is better with a flat-bottomed dish.

Crack the egg into a separate bowl before adding it to the dry ingredients so that it won’t ruin the mixture if it is bad.

Slightly melting the butter makes it easier and quicker to mix in.

I sift the ingredients for the sauce – brown sugar and cocoa – over the mixture because it distributes it more evenly across the pudding.

Sift the brown sugar and cocoa over the mixture to distribute it evenly.

Sift the brown sugar and cocoa over the mixture to distribute it evenly.

When stirring the water over the top, make sure you don’t dip the fork or spoon down too low – do not mix the pudding mixture with the sauce mixture – the brown sugar/cocoa and water should sit on top.

Once you’ve added the sauce ingredients, the top layer should smell and taste like hot chocolate.

The mixture should taste and smell like hot chocolate.

The mixture should smell and taste like hot chocolate.

Gently passing a fork or spoon through to the bottom of the bowl ensures the sauce makes it way through the mixture and to the bottom of the bowl.

The sauce should form at the bottom of the bowl.

The sauce should form at the bottom of the bowl.

Keep an eye on the mixture while it’s cooking in the microwave so that it doesn’t rise over the lip of the bowl – this is why I like using glass bowls, so you can see through them.

Do not stop the microwave while the mixture’s cooking unless something happens to it or the microwave.


That’s it – enjoy your 10-minute self-saucing chocolate pudding hot from the (microwave)oven.


Until next time


Simple French Toast

Simple French Toast

  • Servings: 8+ slices
  • Difficulty: Easy
  • Print

WEB20141001_122618

Ingredients

  • 3/4 cups milk
  • 1/2 tsp cinnamon
  • 2 tbsp sugar
  • 2 eggs
  • 8+ slices of bread
  • 10g butter

Method

  1. Combine milk, cinnamon, and sugar in a bowl and beat.
  2. Beat eggs in a separate bowl.
  3. Heat fry pan on medium heat and rub with butter.
  4. Dip both sides of one slice of bread first in the milk mixture and then in the eggs.
  5. Fry bread for one minute on each side or until golden.

Notes

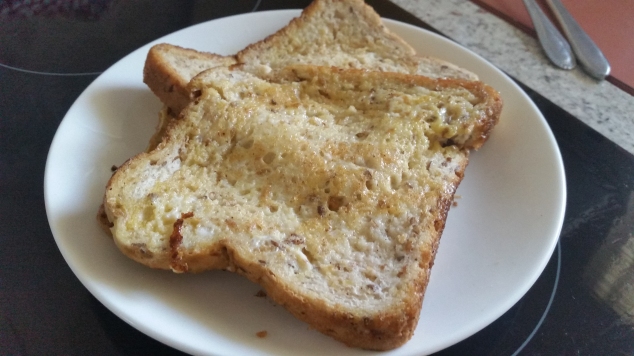
The photo doesn’t do it justice and it does taste better than it looks in the photo.

Thick slices of bread hold up better than thin slices.

WEB20141001_121443

Use wide bowls, like the glass bowl.

Use wide bowls (like the glass one in the photo), as it is easier to dip the bread.

Be careful not to cook the bread for too long, as the egg starts to cook too much.

This is another recipe that kids will enjoy.


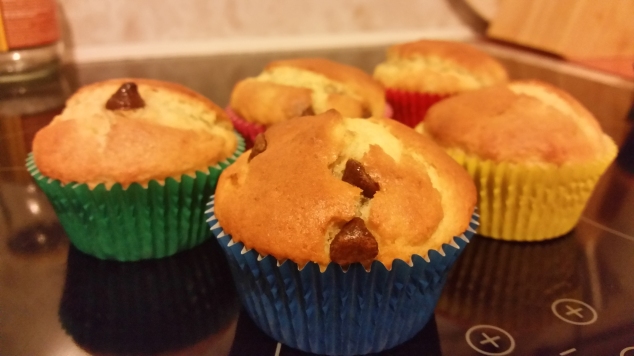
Chocolate Chip Banana Muffins (or Loaf)

Chocolate Chip Banana Muffins (or Loaf)

  • Servings: 12 muffins (or 1 loaf)
  • Difficulty: Easy
  • Print

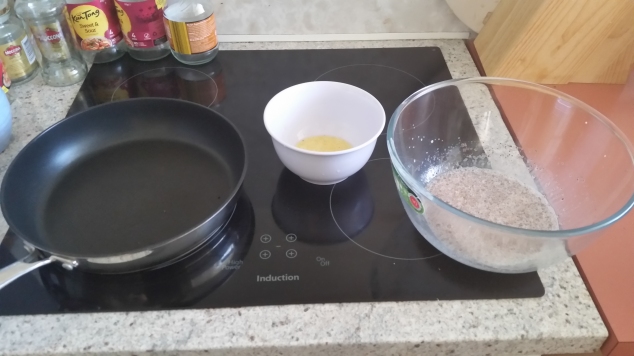
WEB20140925_195236

Ingredients

  • 60g butter
  • 2 cups self raising flour
  • 1/2 cup caster sugar
  • 1/2 cup milk
  • 2 eggs
  • 2 ripe bananas, mashed
  • up to 1 cup (200g) chocolate chips

Method

  1. Preheat oven to 200°C. Line muffin tray with 12 patty cases (or line one loaf tin with baking paper).
  2. Melt butter and set aside.
  3. Sift flour and sugar together into a bowl and mix. Make a well in the centre.
  4. Whisk eggs, milk, and butter together and fold into dry ingredients.
  5. Mix in bananas and chocolate chips.
  6. Spoon mixture into patty cases (or pour into lined loaf tin) and bake for 20 minutes or until browned.
  7. Remove from oven and allow to rest for a few minutes before removing from the tray.

Notes

Do not use an electric beater. This will stop the mixture from becoming fluffy and light. Gently fold the mixture together instead.

Make sure you mix the wet ingredients through all the dry ingredients, because a mouthful of flour is not pleasant.

If your dry ingredients aren’t mixing in properly, add more banana. This adds more flavour without the mixture becoming watery.

Sifting the flour and sugar is important, as this stops the mixture from becoming lumpy.

I only use one banana because the taste of one is strong enough for me. In general, use two small ones or one large one.

WEB20140925_192240

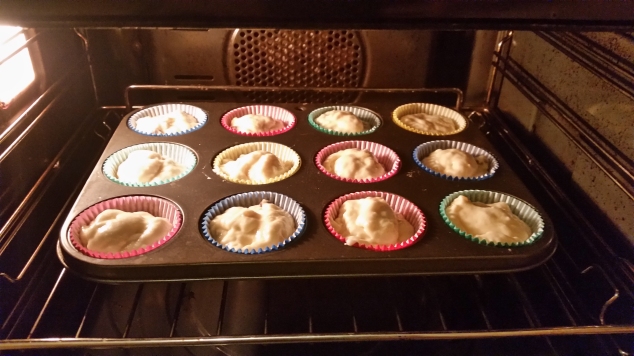
Fill the patty cases 3/4.

Fill the patty cases about 3/4.

Bake in the bottom-middle of the oven so they do not burn.

Rotate the tray 180° halfway through baking to make sure they brown evenly.

Each oven is different, so keep an eye on them when they’re almost finished. They’re ready when a skewer (or toothpick, or butter knife etc.) inserted into the centre comes out clean.

Loaves usually take longer to bake because they’re bigger, so take this into consideration.

WEB20140925_202055

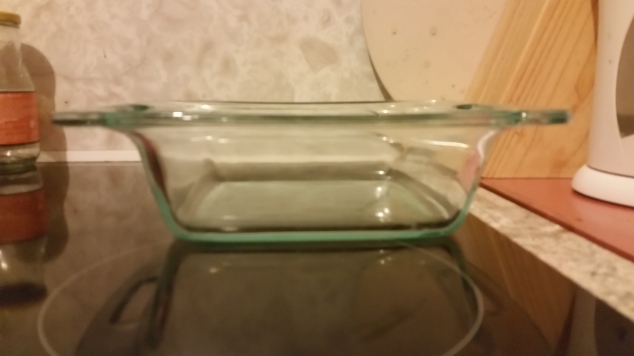
I use a deep 20cm square glass baking dish to make the loaf.

I use a deep 20cm square glass baking dish to make the loaf.

Allowing them to rest before removing from the tray ensures they keep their shape.

If you want them to have more of a brown appearance, use wholemeal self raising flour.

The chocolate chips are optional, but they do make the recipe more amazing. If cooking for kids, I would recommend using 200g.

Also let the kids mash the bananas – it’s fun.


Chocolate Chip Pancakes

Chocolate Chip Pancakes

  • Servings: 24
  • Difficulty: Easy
  • Print

WEB20140924_094803

Ingredients

  •  2 cups self raising flour
  • 1/4 tsp bicarbonate of soda
  • 1/3 cup caster sugar
  • 1 1/2 cup milk
  • 1 egg
  • 1 tsp vanilla essence
  • 50g butter
  • up to 200g chocolate chips

Method

  1. Melt butter and set aside.
  2. Sift flour and bicarb soda together. Stir in sugar. Make a well in the centre.
  3. Whisk milk, egg, and vanilla together. Pour into well in dry ingredients. Combine well.
  4. Add desired amount of chocolate chips and stir through.
  5. Heat fry pan on medium heat. Cover base of pan with butter.
  6. Pour pancake batter into pan to desired size.
  7. Cook pancakes until bubbles form over the surface. Flip the pancakes. Cook on other side for 1-3 minutes.
  8. Remove from pan. Add more butter for next batch of pancakes.

WEBpancakes12

Notes

Do not use electric beaters for any part of this recipe. Hand mixing the batter makes for fluffier pancakes.

Do not press the pancakes after you have flipped them. Touching the pancakes outside of flippping and taking them out of the pan is strictly forbidden. (Unless you want flat, squashed pancakes.)

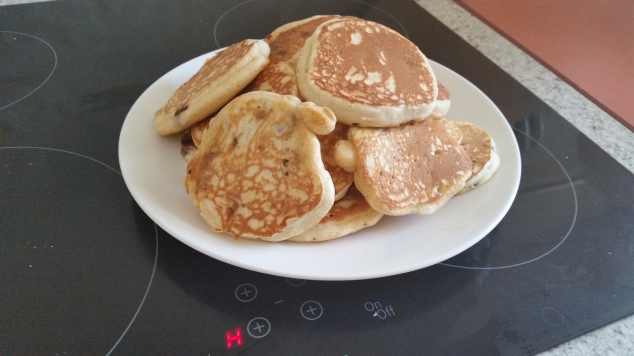
I made about 24 pancakes, each about the same size of the ones in the photos.

Sifting the flour, bicarb soda, and caster sugar is important, as this stops your pancake batter from being lumpy. The only lumps you want in your pancakes are the chocolate chips.

I whisk the egg and vanilla together first so I know the yolk is broken up properly. I then slowly pour the milk in as I’m whisking.

You can use as many (and as many different kinds of) chocolate chips as you want. If you’re cooking for the kids, I would use 200g. You can always sprinkle extra chocolate chips over the pancakes after you’ve poured them into the pan.

WEB20140924_091555

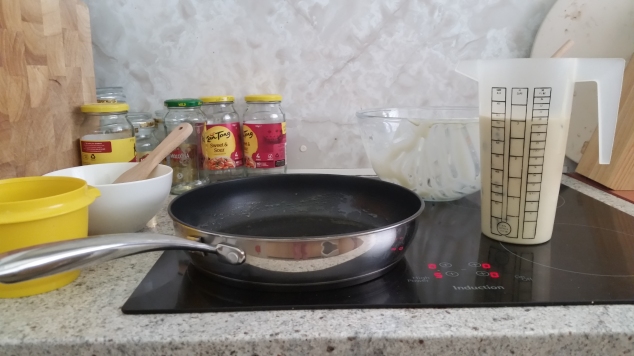
Pour the batter into a tall jug with a spout.

A clever idea is to pour the batter into a tall jug with a spout. This makes it easier to pour the batter into the pan. (This recipe makes three cups of batter.)

Cooking the pancakes with butter gives them a lovely taste, but if you don’t have butter you can use oil.

Make sure you add extra butter to the pan before you pour new batter in; this way you know the pancakes won’t stick.

You can make the pancakes as big as you want, but remember bigger pancakes take longer to cook.

WEB20140924_093608

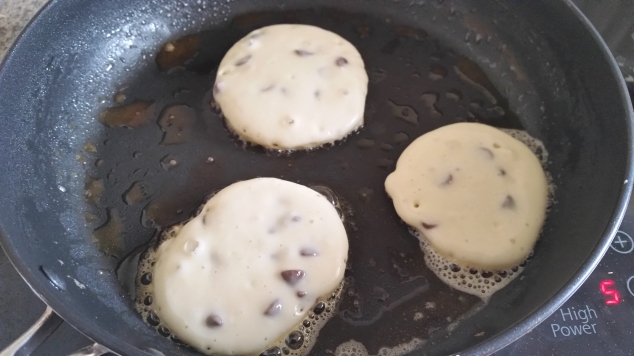
Make sure there are several bubbles over the surface before flipping.

There should be several bubbles on the surface of your pancake before you flip it for the first time. Flipping when there are too few bubbles means the pancake will still be raw. Flipping when there are too many bubbles means you will have burnt the pancake – burnt chocolate chips neither smell nor taste great.

Each stove top is different – mine only takes about one minute to cook the pancakes on each side. The best way to tell is with the bubbles – experiment with a few small pancakes so you get the hang of telling when how many bubbles is enough. But again, remember that larger pancakes take longer to cook.

And once you’ve flipped the pancakes, you will have to time them depending on the power of your stove top – again, each stove is different. The pancakes should be ready if they move easily when you gently nudge them.


Classic Vanilla Cupcakes

Classic Vanilla Cupcakes

  • Servings: 12
  • Difficulty: Easy
  • Print

WEB20140919_121104[1]

Ingredients

  • 100g butter, room temperature
  • 1/2 cup caster sugar
  • 1 tsp vanilla essence
  • 2 eggs
  • 1 1/3 cups self raising flour
  • 1/3 cup milk

Method

  1. Preheat oven to 180°C (160° fan-forced). Line a cupcake tin with patty cases.
  2. Beat butter, caster sugar, and vanilla essence together until light and creamy.
  3. Add eggs, one at a time, beating well between each addition.
  4. Sift the flour over and mix in. Beat until combined.
  5. Add the milk gradually, beating after each addition.
  6. Divide the mixture evenly between the patty cases.
  7. Bake in pre-heated oven for 15-20 minutes.
  8. Remove from oven. Allow to cool fully before icing.

Notes

Every oven is different, so make sure you check your cupcakes a few minutes before your timer is finished. If a skewer (or tooth pick, or butter knife etc.) inserted into the middle of a cupcake comes out clean, then the cupcakes are ready. Also, the cupcakes should be ready when they start to become light brown on top.

Bake in the bottom-middle of the oven so that the cupcakes bake evenly but do not burn.

The butter needs to be at room temperature so it is easy to mix into the sugar. Softening the butter slightly in the microwave (10-15 seconds) works well also. Cutting the butter into small squares also helps.

After sifting the flour over the butter mixture, hand mixing first is a good idea, so the beaters do not throw flour everywhere. Sifting the flour in gradually works too.

WEB20140919_115139[1]

Half-fill the patty cases.

Half-filling the patty cases with mixture is enough. Do not be too liberal when first spooning the mixture into the cases; adding more mixture is much easier than taking it out.

See also: Chocolate Icing.

Chocolate Icing

Chocolate Icing

  • Servings: 12 cupcakes or a 20cm-round cake
  • Difficulty: Easy
  • Print

WEB20140919_132958[1]

Ingredients

  • 50g butter, room temperature
  • 2tbsp milk
  • 1/4 cup cocoa powder
  • 1 1/2 cups icing sugar mix

Method

  1. Sift icing sugar and cocoa powder together in a bowl.
  2. Add butter and milk and beat together until mixture is a spreadable consistency.

Notes

The butter needs to be at room temperature so it is easy to mix. Softening it in the microwave for 10-15 seconds works just as well.

Hand mixing the butter and milk into the dry ingredients before beating is a good idea.

Wait until the cupcakes or cake are completely cool before icing them, otherwise the icing will run.

Ideally you should make the icing when you are ready to use it, as this will stop it from drying out.

This recipe makes enough icing to liberally cover 12 cupcakes – it should be enough to thinly cover 24 cupcakes. Remember when icing to not be too liberal at first – adding extra icing is easier than taking icing off.

See also: Classic Vanilla Cupcakes.

Chewy Anzac Biscuits

Chewy Anzac Biscuits

  • Servings: 24
  • Difficulty: Easy
  • Print

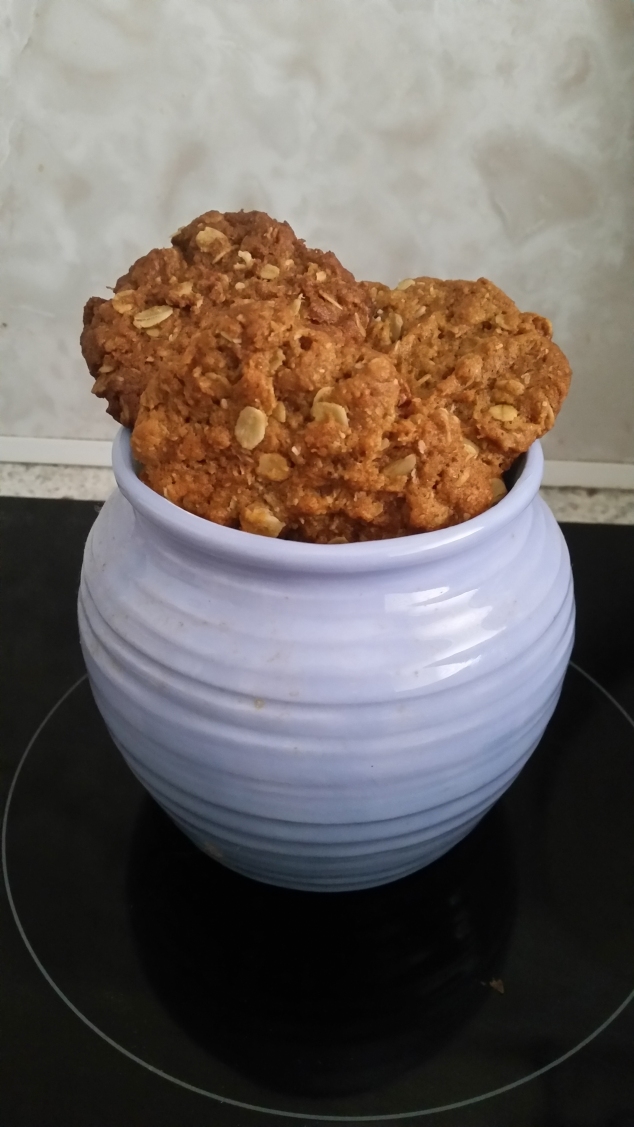
WEB20140910_140242

Ingredients

  • 1 cup plain flour
  • 1 cup rolled oats
  • 1 cup desiccated coconut
  • 3/4 cup brown sugar
  • 125g butter
  • 2 tbsp golden syrup
  • 1 tsp bicarbonate of soda
  • 2 tbsp water

Method

  1. Preheat oven to 160°C. Line one or two baking trays with paper.
  2. Put the butter, golden syrup, and water in a small saucepan. Stir over medium heat until melted. Stir in bicarb soda. Remove from heat.
  3. Sift flour into a large bowl. Stir in the oats, coconut, and brown sugar.
  4. Pour butter mixture into flour mixture and stir until combined.
  5. Roll level tablespoons of mixture into balls. Place on trays, about 5cm apart.
  6. Press each ball with a fork to flatten slightly. Bake for 10 minutes or until golden.

Notes

Using two baking trays means you can rotate between them and baking won’t take as long. I only use one because I don’t usually bake under a time pressure.

Bake biscuits on the bottom shelf of your oven so they do not burn. Turn the tray around 180° halfway through baking so all biscuits brown evenly.

I only bake six biscuits on one tray so they have plenty of room and don’t bake into one big glob of a biscuit. But if one big glob of a biscuit is what you’ve been craving, then go right ahead.

After you take them out of the oven, allow them a few minutes to cool before moving them so they retain their shape.

Make sure you keep the raw mixture covered while baking the biscuits so that it doesn’t dry out.

I usually make a double batch because it makes heaps more.

They’re also really yummy when they’re warm, so I strongly encourage you to try them straight out of the oven, or heat them up before eating them.

If you have any problems with this recipe, know a better Anzac Biscuit recipe, or know how to improve this one, let me know.


Recipe sourced from:

Taste.com. 2014. “Chewy Anzac Biscuits.” Accessed July 15, 2014. http://www.taste.com.au/recipes/15770/chewy+anzac+biscuits.